LAP Application Management - User Guide
Overview
The Lender Application Portal allows you to safely and securely view an application submitted from a broker using the CitoPlus portal including deal data and documents.
Key Points
- Once you click into an application, you can view key information and manage everything in one convenient space
- Built-in functionality allows you to leave notes and send messages to the broker directly within the deal
- Status changes made in LAP are instant and immediately visible to the broker
- Uploaded documents are securely stored with the option to download them at any time
- Easy to update final funded loan details
Details
Step 1: View an Application
From the dashboard, select the deal you wish to view or filter using the 'filter' menu on the right-hand side.

The full deal application will be displayed:
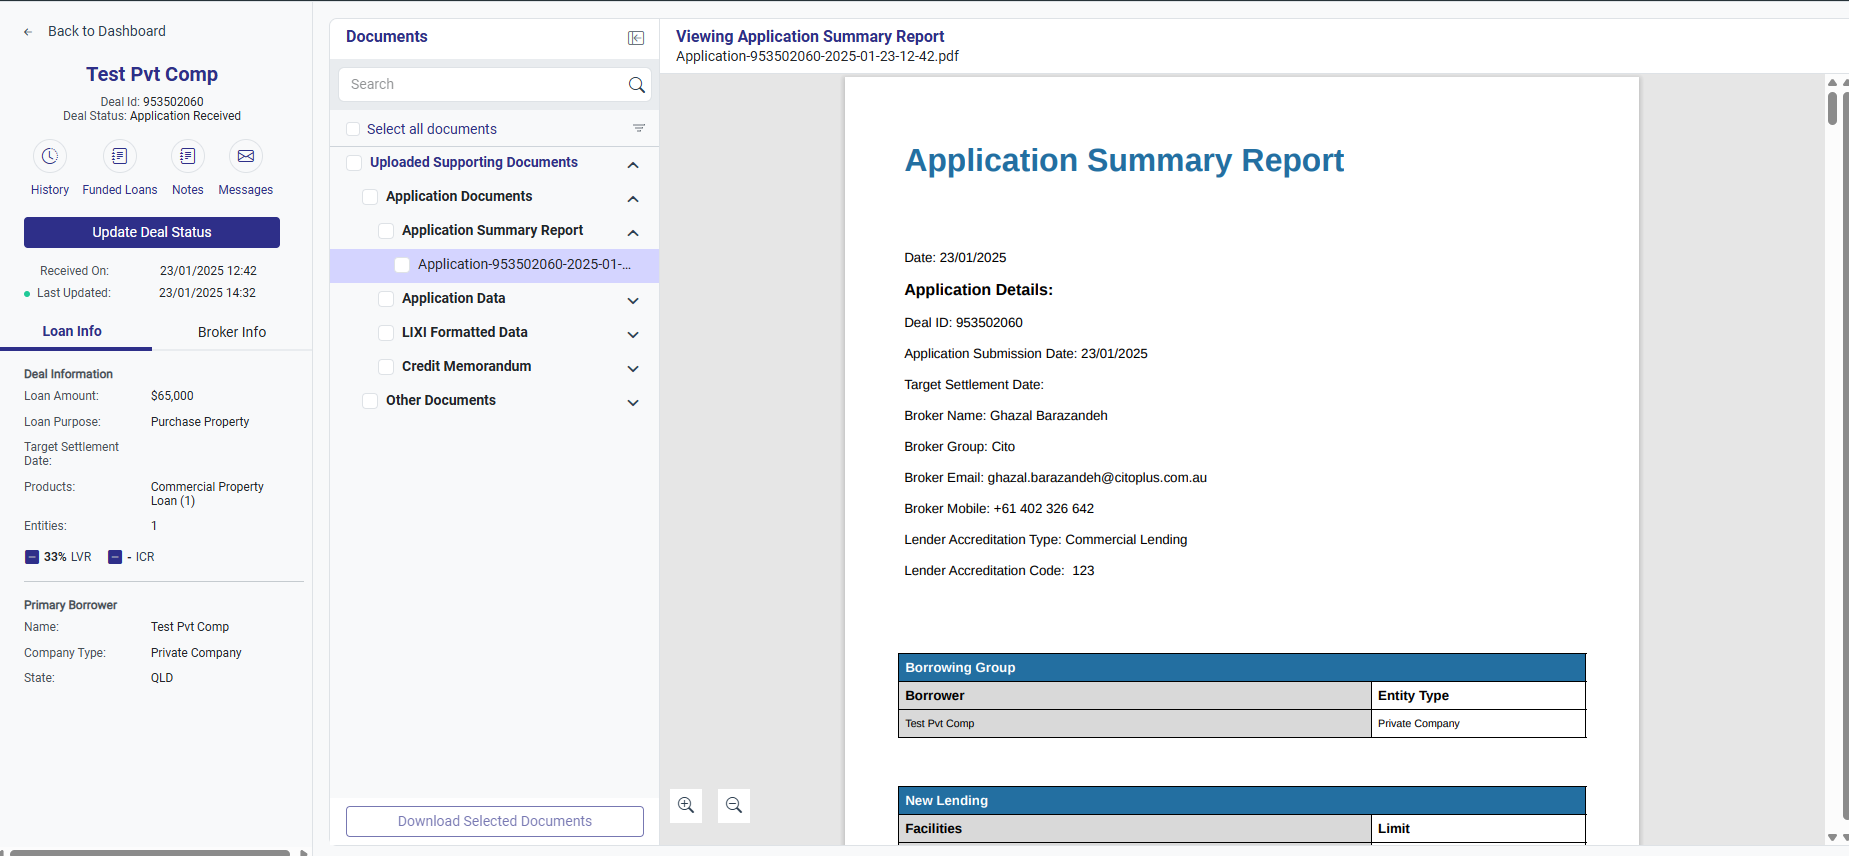
Step 2: View the Deal Summary
On the left-hand side of the deal screen, you will see a summary of the deal - together with key action buttons including:
- Deal History
- Updating the Deal Status
- Internal Notes
- Messages
- Funded Loan Details
- Primary Borrower Details
Step 3: View & Download Documents
- Documents added to an application can be securely viewed and downloaded, ensuring confidentiality while managing sensitive documents throughout the application review process
- Brokers can upload a variety of supporting documents via the CitoPlus platform, including:
- Third-Party Data Sources: UBO/ASIC Reports, Commercial Credit Report, Individual Credit Report
- Deal Data & Other Supporting Documents: ID and Borrower Information, Employment Contract, Tenancy, Contract of Sale
- Financial Documents: Tax Returns, Cashflows and Forecasts, Profit & Loss Statements, Bank Statements, Payslips
- Deal/Commercial Summary
- Data Files - JSON data file and.xls version
Step 4: Sending Notes & Messages
Notes are internal messages, between users within the Lender - these messages are not shared with the broker
- To add notes, click on the 'Notes' button within the deal. You can add unlimited internal notes, with each new note creating a separate box. This feature updates automatically and is viewable by all team members, allowing them to contribute additional information throughout the deal cycle
- Click on ‘Notes’ to begin adding notes or view any notes left within the deal
Messages allow you to interact with the broker, clarifying or requesting additional documents for example
- To send a message, click on the 'Message' button to send a direct message within the deal. Real-time communication between brokers and lenders enhances the overall experience, enabling quicker turnaround for approvals and making it easy to update required changes. This feature updates automatically and is viewable by both parties
Click on ‘Message’ to begin sending messages to the broker or to view any replies from broker.
To attach documents, either click on the attach documents icon (paperclip) or drag and drop the file directly into the text box.
Step 5: Updating the Deal Status
- Keep the broker informed at all times of the status of a deal
- Once you change the status of an application in the Lender Portal, it will update on the broker's side
- You can use the search function or scroll down to select and apply the updates. Any comments left will be saved in the application history and viewable by brokers
Step 6: Funded Loan Details
Where a deal has been finalized and funded - you can record these details directly into the application ensuring that all relevant information is captured and organized for the broker to view.
To update the funded loan details, click on ‘Funded Loans’ tab then click on the ‘Plus +’ button to start filling in required details.
To proceed, you will need to select a loan that has already been submitted within the application. If multiple loans are available, you will need to choose one. Once selected, the loan details will be automatically pre-filled into the relevant sections of the application. Please note that the system does not pre-fill all information, so you may need to manually enter any missing details. In some cases, you also have the option to override the pre-filled information. Once all funded loan details have been entered, you can go ahead and save the loan details and they will be reflected in the summary section, displaying key fields, which includes:
- Primary Borrower
- Product Family
- Customer Rate
- Repayment Amount
- Approved Limit
- Funded Amount Loan Expiry Date
- Actions - this is only for deleting or editing the loan details
If needed, you can add multiple sets of funded loans by clicking on the ‘Add Loan’ button, allowing you to manage and track multiple loans within the same deal.
Related Articles
LAP Application Management - Quick Reference Guide
LAP Application Management Quick Reference Guide For a handy guide to managing your LAP Application Management, download or save the attached Quick Reference Guide.LAP Dashboard - User Guide
Overview The Lender Application Portal (LAP) offers a comprehensive and streamlined experience for managing applications submitted to lenders. Whether you're navigating the summary board or using the provided filter tiles, you’ll have full control ...LAP Account Settings - Quick Reference Guide
LAP Account Settings Quick Reference Guide For a handy guide to managing your LAP Account Settings, download or save the attached Quick Reference Guide.LAP Account Settings - User Guide
Overview Navigating and managing your account settings within the Lender Application Portal is designed to be a seamless and user-friendly experience. Your accounts and settings is divided into three main sections: Personal Details, where you can ...LAP Dashboard - Quick Reference Guide
LAP Dashboard Quick Reference Guide For a handy guide to managing your LAP Dashboard, download or save the attached Quick Reference Guide.